

DIY Desk Cable Management That Actually Works
Your phone charger has slipped behind the desk again, the headset cable catches your chair, and swapping a monitor means tracing wires through a tangled pile. DIY desk cable management works best when you build accessible routes, support heavy adapters, and leave room for devices to move. Hide what you can, but prioritize a setup you can inspect, troubleshoot, and change without dismantling it.
Updated for October 2026
Why Your Desk Cables Are a Problem Worth Solving
A desk can look immaculate from the front while hiding an awkward mess underneath. Cover every wire in a sleeve, pack the adapters behind a drawer, and the photograph improves, but replacing a failed display cable becomes unnecessarily difficult.
A slightly more visible setup often works better. A labeled connection beside the dock and an accessible tray beneath the desktop aren't styling failures. They're useful places to reach when something stops working.
This is the kind of clutter worth fixing before buying more accessories:

Treat the desk as a small system
Cable organization has roots in structured telecommunications wiring. ANSI/TIA-568 arrived in 1991, establishing a widely recognized structured-cabling standard, according to this history of structured cabling.
Your desk doesn't need commercial infrastructure. It needs the same underlying discipline: predictable routes, identifiable connections, and changes that don't disturb unrelated equipment.
Consider the practical failure points:
- Unsupported weight: A hanging laptop power brick puts unnecessary load on its cable and connections.
- Moving equipment: A monitor arm or microphone boom can pull a lead that looked perfectly positioned while stationary.
- Floor clutter: Loose loops can enter walking paths or catch under chair wheels.
- Inaccessible connections: A buried USB hub makes a simple peripheral swap frustrating.
The University of Toronto Office Ergonomics Standard calls for cable arrangements that support safe component operation, provide sufficient length, and preserve access for cleaning and maintenance. That's a more useful benchmark than whether every wire disappears.
Practical rule: Organize cables around the jobs they perform, not around the photograph you want afterward.
Choose your priorities before choosing your finish. Gaming stations need accessible peripheral connections; remote-work desks need convenient laptop docking; phone-charging areas need leads that remain easy to grab.
For layout inspiration, explore these gaming desk setup ideas, then evaluate each arrangement as part of your broader home office connectivity setup. Ask where you'll reach, where equipment moves, and where a replacement cable would travel.
Tools and Materials Worth Buying (And What to Skip)
Buy accessories to solve identified problems. A tray supports weight, a clip controls direction, and a sleeve groups a visible run. None replaces the others.
The budget illustration below provides a shopping framework, not verified current prices. Choose by function and desk compatibility before comparing costs.
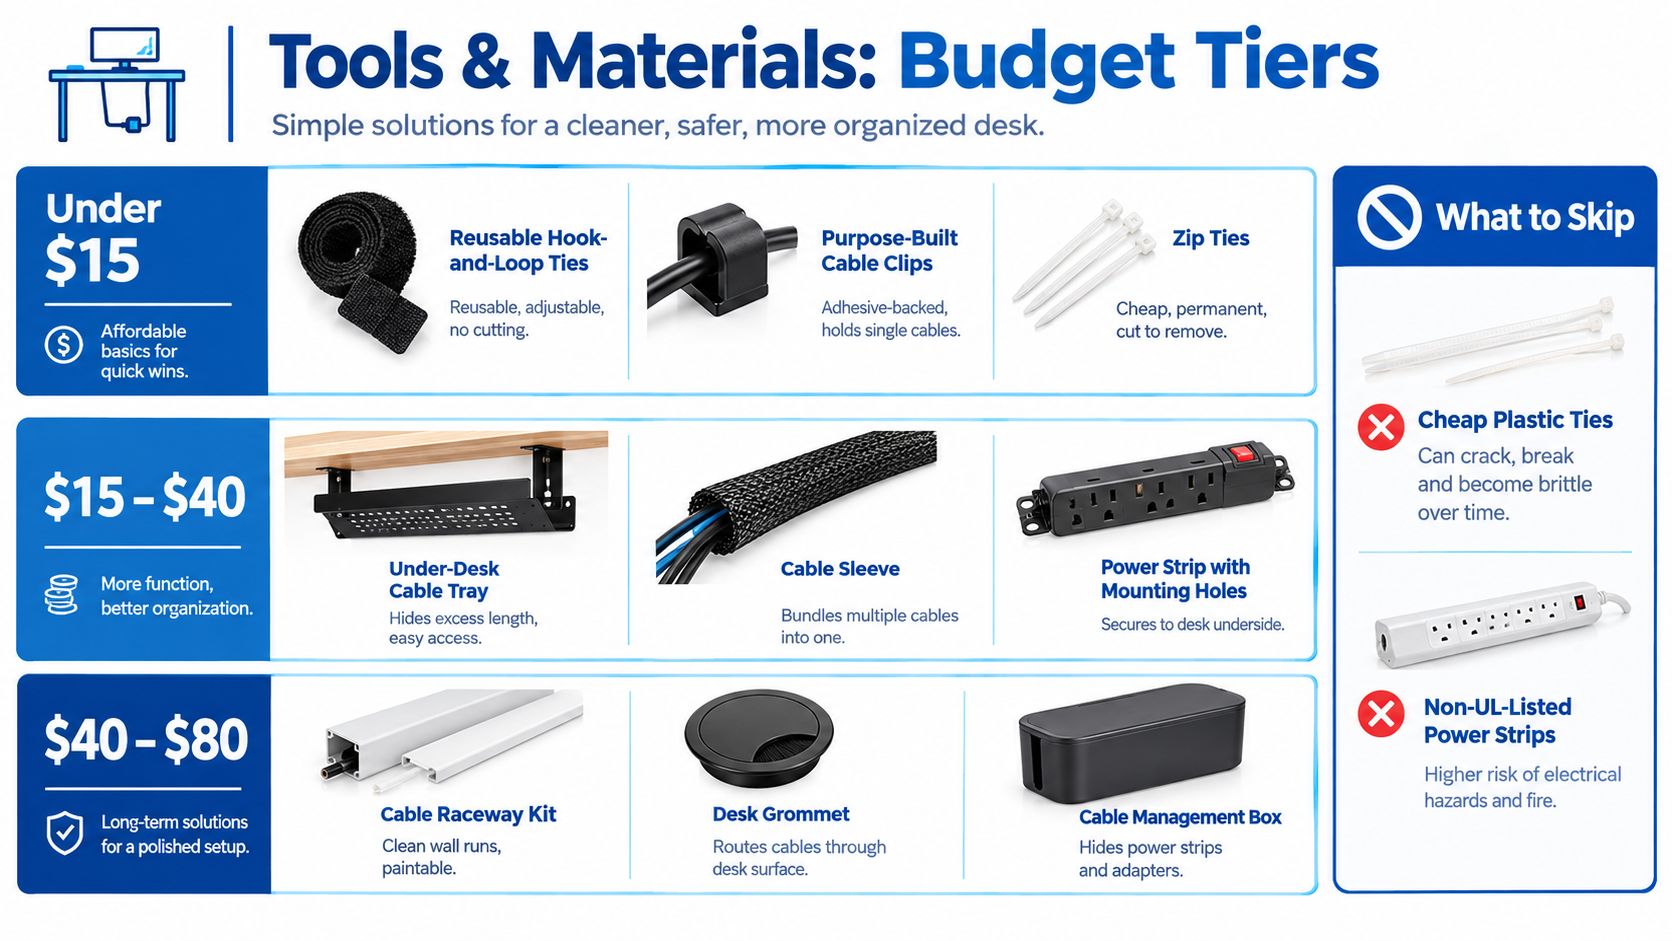
Start small and buy around the mounting surface
| Kit level | Useful materials | Main trade-off |
|---|---|---|
| Minimal | Hook-and-loop straps, labels, purpose-built clips | Controls loose cables without hiding bulky adapters |
| Practical | Accessible tray, reusable sleeves, mountable power strip | Requires checking attachment and load compatibility |
| Concealed | Removable-cover raceways, suitable grommets, ventilated enclosure | Adds installation work and can reduce access |
Reusable hook-and-loop straps are the sensible default for bundles. Leave them loose enough that the cable jackets retain their shape. Handwritten labels can handle identification; a label maker is convenient, not mandatory.
For a hollow-core desktop, don't assume a screw will find solid material. Check the desk construction and accessory instructions. With glass, don't improvise drilling or clamp pressure. Use a mounting method explicitly compatible with that surface.
Adhesive clips suit lightweight leads, but they shouldn't become makeshift power-brick supports. Check surface preparation, curing instructions, and load ratings rather than assuming adhesive will hold indefinitely.
Skip fasteners that make servicing harder
OSHA's electrical equipment-use regulation prohibits fastening flexible electrical cords with staples or hanging them in ways that damage their jackets or insulation. That makes staples, nails against cables, and sharp improvised brackets poor choices.
- Tight plastic ties: They can compress cables and must be cut for changes. Don't cinch them around flexible power cords.
- Sealed decorative boxes: Concealment isn't worth losing inspection access or ventilation.
- Oversized accessory kits: Buy a raceway only when you've identified a route that needs one.
- Unverified power strips: Check appropriate certification, overload protection, and the equipment manufacturer's requirements.
Phone, laptop, and accessory charging often deserve their own accessible zone. Before buying another organizer, plan a multi-device charging station around the chargers you use.
Use this video as an additional visual reference while evaluating routing options:
Mapping Your Setup Before You Touch a Cable
Start with the desk in its normal working position. Keep the laptop, displays, microphone, speakers, and charging accessories where you use them, not where they look tidiest.
Draw a simple top-down sketch. Mark the wall outlet, desktop edges, monitor-arm base, dock, and any existing grommets. Then look underneath: chair travel and foot space matter as much as the desktop.
Use this planning sequence before committing to attachments:
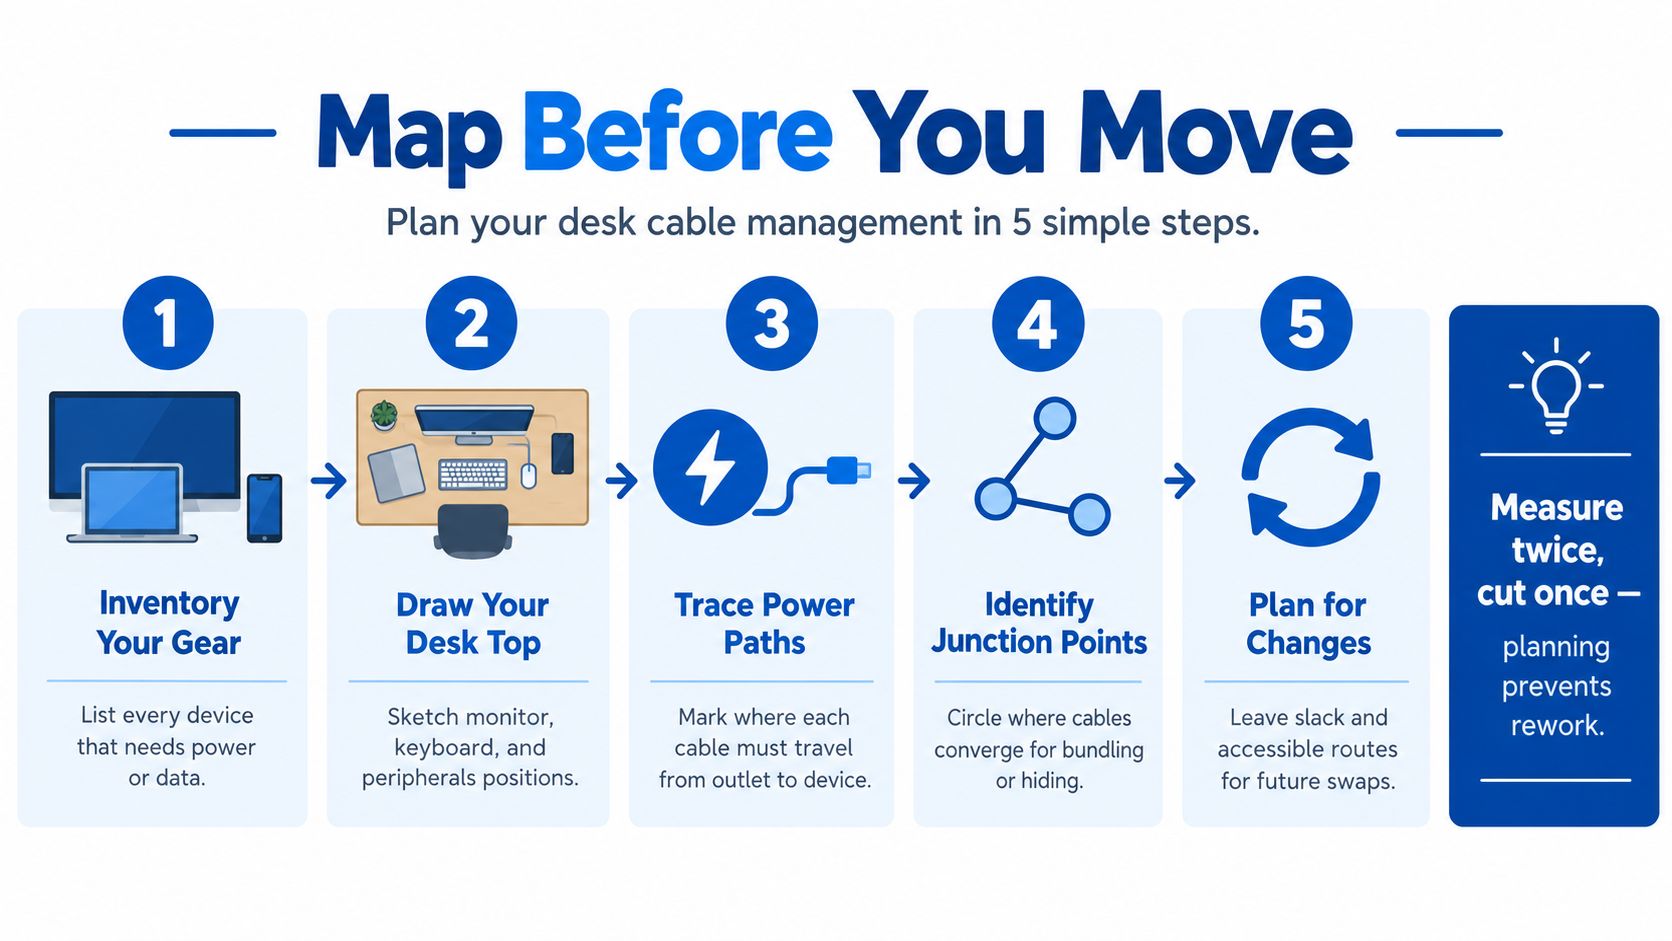
Map destinations and movement
- Inventory connections: Record each device, its power source, and its data destination. Include easily forgotten equipment such as webcam leads and speaker adapters.
- Classify movement: Distinguish desk-mounted equipment from floor-standing equipment and accessories you regularly remove.
- Measure the actual path: Follow the proposed route around edges and supports, rather than measuring straight between ports.
- Mark junctions: Identify where cables converge, where bundles split, and where a removable accessory needs an independent exit.
- Identify both ends: Use meaningful labels such as “main display power” or “dock USB,” not labels that require another lookup.
For a sit-stand desk, the important measurement is the longest required run, including movement. There's no universal slack allowance that fits every frame, outlet position, or monitor arm.
Adjustable-desk cable-management guidance supports testing the entire height range and checking that cables and connectors never become taut. Perform that test with provisional routing before final fastening.
Make the movement test realistic
Raise and lower the desk while watching the transition between moving and stationary equipment. Turn the monitor, extend the microphone boom, and move the laptop into its usual docking position.
A useful service loop is controlled spare length near a moving connection. It shouldn't hang into the chair lane or become trapped in the desk mechanism.
A cable that reaches its port only when everything sits perfectly still is too short for that route.
If your workstation includes Ethernet and shared network equipment, Networking2000's office network cabling tips offer a broader planning resource. Keep that network route visible on your sketch rather than treating it as an afterthought.
Before fastening display leads, review your monitor-arm setup. Position the arm for comfortable use first, then fit the cable route to its movement.
Routing and Securing Cables the Right Way
Work from the power source toward the equipment. Before rearranging power connections, shut down affected devices and disconnect their power. Don't mount accessories while equipment remains precariously balanced or cords are stretched.
Begin with the wall connection, not the bundle beneath the monitor:
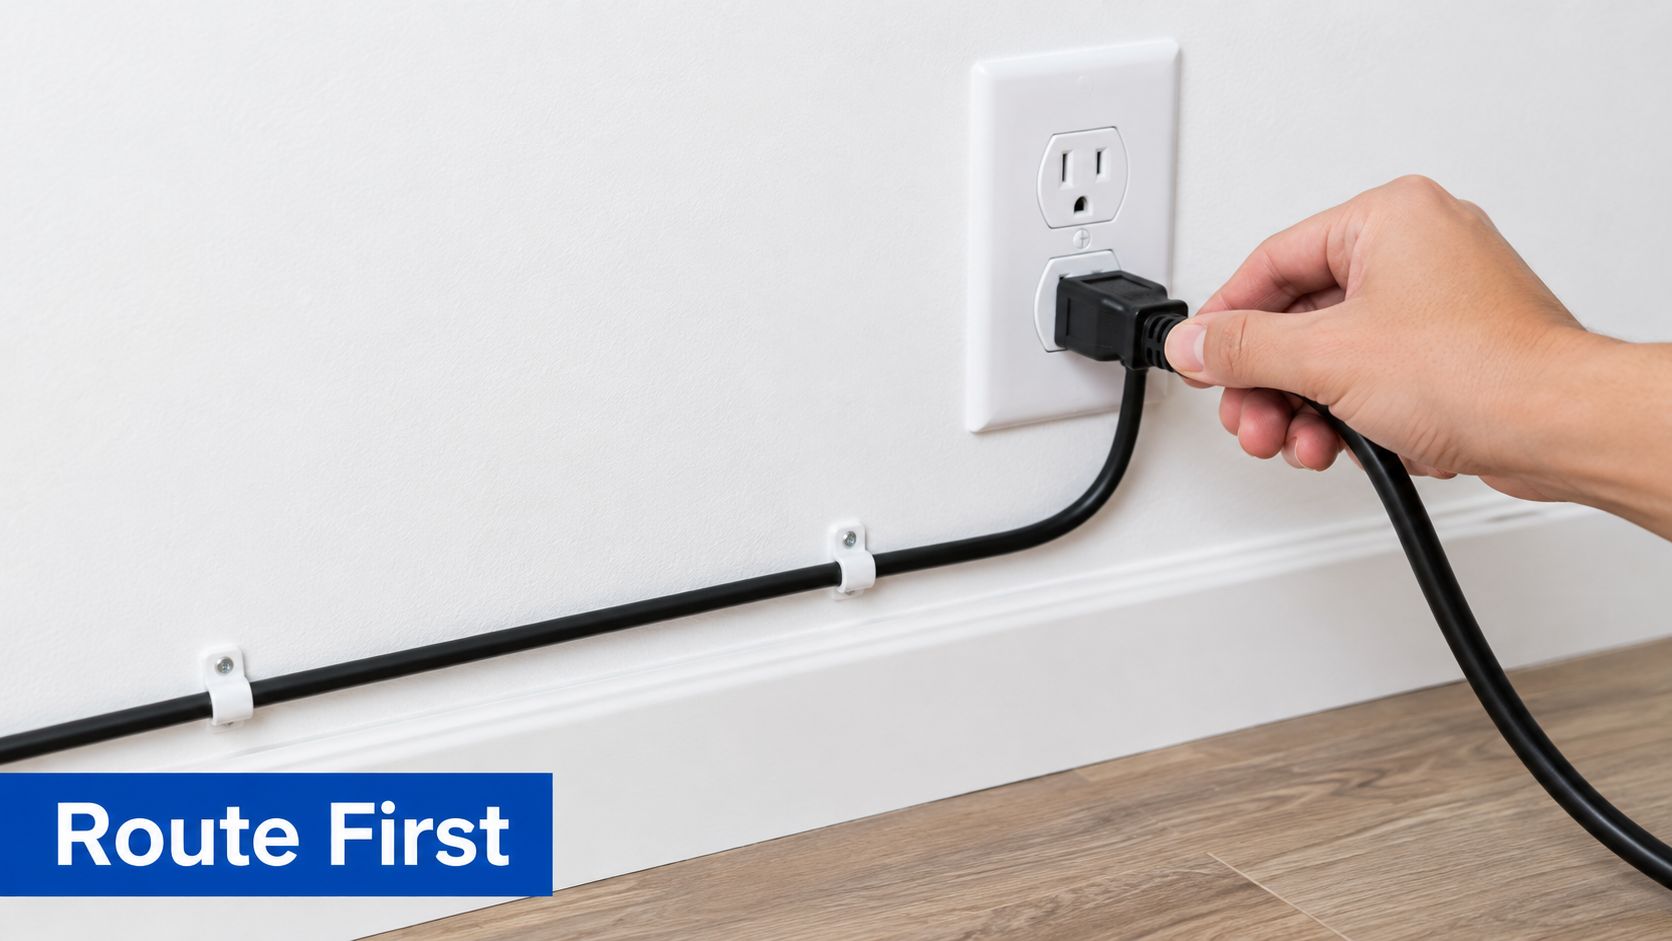
Establish the power route
Connect an appropriately rated power strip directly to the wall outlet. Mount it only through a manufacturer-approved method, with the switch, plugs, and ratings still accessible.
Wake Forest's office fire-safety guidance says power strips should connect directly to wall outlets, shouldn't be daisy-chained, and shouldn't supply high-power appliances such as heaters or coffee makers. Keep those appliances out of the desk power arrangement.
There's no universal wattage allowance for a workstation. Check the strip's marked rating, connected equipment requirements, and applicable electrical guidance. Adding sockets doesn't increase the capacity of the outlet or circuit.
Electrical boundary: Never solve a shortage of sockets by plugging a power strip, surge protector, or extension cord into another.
MIT's electrical-safety guidance explicitly warns against that practice and says extension cords must be appropriately rated and used only temporarily. It also advises against putting equipment drawing more than 5 amps or 600 watts on a power strip; treat that as MIT's guidance, not a universal permission threshold.
Build accessible paths
- Support adapters first: Place power bricks in a suitable tray or manufacturer-compatible mount. Don't let their weight hang from connectors.
- Keep ventilation available: Avoid burying adapters beneath fabric, tightly packed cables, or drawer contents. Follow each adapter's placement instructions.
- Route mains separately where practical: Give power and USB, display, Ethernet, and audio leads distinct paths. This makes tracing and replacing them easier.
- Guide surface connections: Use a suitable grommet or rear-edge route without forcing cables against sharp edges.
- Fasten provisionally: Close reusable straps only after the movement test succeeds.
Give headset charging leads and frequently disconnected USB accessories their own accessible branches. A webcam cable can follow the monitor route, while a microphone boom needs its own movement allowance.
For small directional changes, compare cable-organizer clip options against the diameter and weight of the intended lead. Use clips to guide cables, not to squeeze them into place.
Designing for Upgrades, Not Just Before-and-After Photos
The all-in-one bundle looks efficient until you need the cable in its center. A new monitor, replacement dock, or different headset shouldn't force you to reopen every attachment beneath the desk.
Reconfiguration-ready cable management keeps frequently changed connections accessible and separates them from stable infrastructure. The relevant question isn't “How much can I hide?” It's “What happens when this component changes?”
Choose where connections will live
| Architecture | Movement and access | Replacement trade-off | Suitable use |
|---|---|---|---|
| Fixed desktop hub | Ports stay within easy reach | Visible connections, straightforward cable swaps | Laptop docking and frequent accessory changes |
| Under-desk hub | Clears desktop space | Requires convenient underside access | Stable workstation with occasional changes |
| Monitor-mounted hub | Moves with the display | Requires careful articulation and load checks | Display-centered arrangement with nearby peripherals |
These are layout choices, not guarantees that a particular hub will suit your equipment. Check USB capabilities, power requirements, mounting compatibility, and the cables your devices require.
A desktop hub makes sense when you regularly connect a phone, camera, or audio accessory. Keeping its ports reachable is more valuable than hiding its short upstream cable.
An under-desk hub favors visual restraint. Put it near an accessible edge rather than deep behind a tray, and make sure you can disconnect it without removing mounted equipment.
A monitor-mounted hub can keep connections close to the screen, but every repositioning changes the cable geometry. Don't add a mount or accessory load the monitor or arm manufacturer doesn't permit.
Build branches instead of a sealed trunk
Keep stable display and network runs grouped loosely. Let portable chargers, removable USB peripherals, and audio accessories leave the route independently.
Use removable-cover raceways where you expect changes. A tightly wrapped sleeve may suit a stable visible drop, but it's a poor default for a branch containing frequently replaced accessories.
Maintenance test: Remove a representative cable without cutting a fastener or disturbing an unrelated connection. If that's awkward, revise the route before calling it finished.
Leave physical room for another lead, too. A tray packed to its usable limit has no convenient place for the next charger.
Good organization should survive a failed cable, not just survive being photographed. Accessible routing is a deliberate finish choice, not unfinished work.
Finish Options From Hidden to Displayed
Once the connections work comfortably, choose how much of the system you want to see. Full concealment, tidy visibility, and deliberate display can all look considered when the routes are consistent.
Match the finish to your daily use rather than assuming hidden cables are always the premium option. A desk facing a webcam has different priorities from a creator's workstation that changes between recording sessions.
Match the finish to the workflow
Full concealment suits a camera-facing home office. A suitable enclosure, underside tray or net, and removable channels can reduce visual distractions, provided plugs and adapters remain accessible and ventilation isn't compromised.
For a working desk, visible-but-organized is often the easier compromise. A neat rear-edge route with readable labels lets you inspect connections without opening decorative covers.
An exposed gaming or creator setup can use matching cloth sleeves and clearly separated drops. Keep the arrangement intentional, but don't add unnecessary cable length just to create a visual pattern.
Cable Management Finish Tiers Compared
| Finish Tier | Estimated Cost | Install Time | Maintenance Ease |
|---|---|---|---|
| Fully concealed | Higher accessory spend | More mounting and fitting work | Depends heavily on removable access |
| Visible but organized | Moderate accessory spend | Less finishing work | Generally straightforward |
| Deliberately displayed | Variable with sleeve and finish choices | More attention to alignment | Easy when sleeves open readily |
These are qualitative planning estimates, not current prices or measured installation times.
Make small finishing choices count
- Consistent straps: Use a matching strap color where appearance matters.
- Readable connection labels: Put identification where you can see it during a swap, not deep inside the enclosure.
- Appropriate adapters: Consider a right-angle connector only after checking clearance, compatibility, and the direction it faces.
- Clear access points: Keep portable charging leads near the edge instead of hiding their usable ends.
Don't let an adapter create a different obstruction or force an adjacent plug sideways. The cleanest detail is the one that fits naturally without making the connection harder to use.
Safety Checks and a Maintenance Routine That Lasts
Treat cable management as part of cleaning and equipment changes, not a completed decoration project. Recheck the arrangement whenever you move the desk, change a device, or notice a snag.
OSHA's office-safety guidance calls for routine cord inspection, including plugs behind furniture where pressure can sharply bend wiring. It also says extension cords must remain in good repair, avoid trip hazards, never pass through a closing doorway, and be grounding type.
Keep a repeatable inspection checklist
- Inspect cord condition: Look for fraying, crushed sections, exposed wiring, and damaged plugs.
- Check connection access: Confirm furniture hasn't pressed against outlets or shifted a plug.
- Repeat the movement test: Watch desk travel and articulated equipment for tension or trapped loops.
- Clear travel lanes: Remove any cable that has slipped into foot space or chair-wheel paths.
- Review power connections: Confirm the direct-wall arrangement remains intact and temporary extensions haven't become permanent.
Don't hide a damaged cord inside a sleeve. Remove it from use and choose an appropriate replacement; review Longwell power-cord guidance before comparing connector types and equipment compatibility.
How often should I recheck desk cables?
Check during cleaning and after rearrangements. Inspect immediately if a cable snags, a plug loosens, or equipment stops working unexpectedly.
What should I do when a new device arrives?
Update your route map, check its power requirements, and add an independent branch where practical. Test movement before fastening it.
Is hiding cables under a rug safe?
Don't use a rug to conceal a floor crossing. Reroute the cable or use a suitable cable cover without introducing another obstruction.
DigiDevice offers chargers, adapters, cables, and desk-setup guidance to help you match accessories to your workstation. Visit DigiDevice, check connector compatibility and mounting needs, then check price before buying the parts your routing plan requires.