

Wireless Microphone for Vlogging: Complete Guide
You're halfway through a shoot, the framing looks good, and then playback ruins it. The voice is thin, the wind is obvious, and your phone's built-in mic has dragged the whole clip down. A wireless microphone for vlogging fixes that problem by putting the microphone where your voice is, not where the camera happens to sit.
Updated for March 2026, this guide is for creators who want clean audio without turning every walk-and-talk into a cable-management exercise. The focus is simple, what works in real vlogging conditions, what falls apart outdoors, and how to choose a system that fits your phone, camera, and shooting style.
What a Wireless Microphone for Vlogging Actually Does
The first time a walking vlog sounds crisp instead of mushy, it's hard to go back. You notice it most in everyday scenes, a market pass, a subway entrance, a quick street interview, or a home vlog where the camera stays a few feet away while you move around naturally. That's where a wireless microphone for vlogging earns its place, because it keeps your voice close to the capsule while the camera stays free.
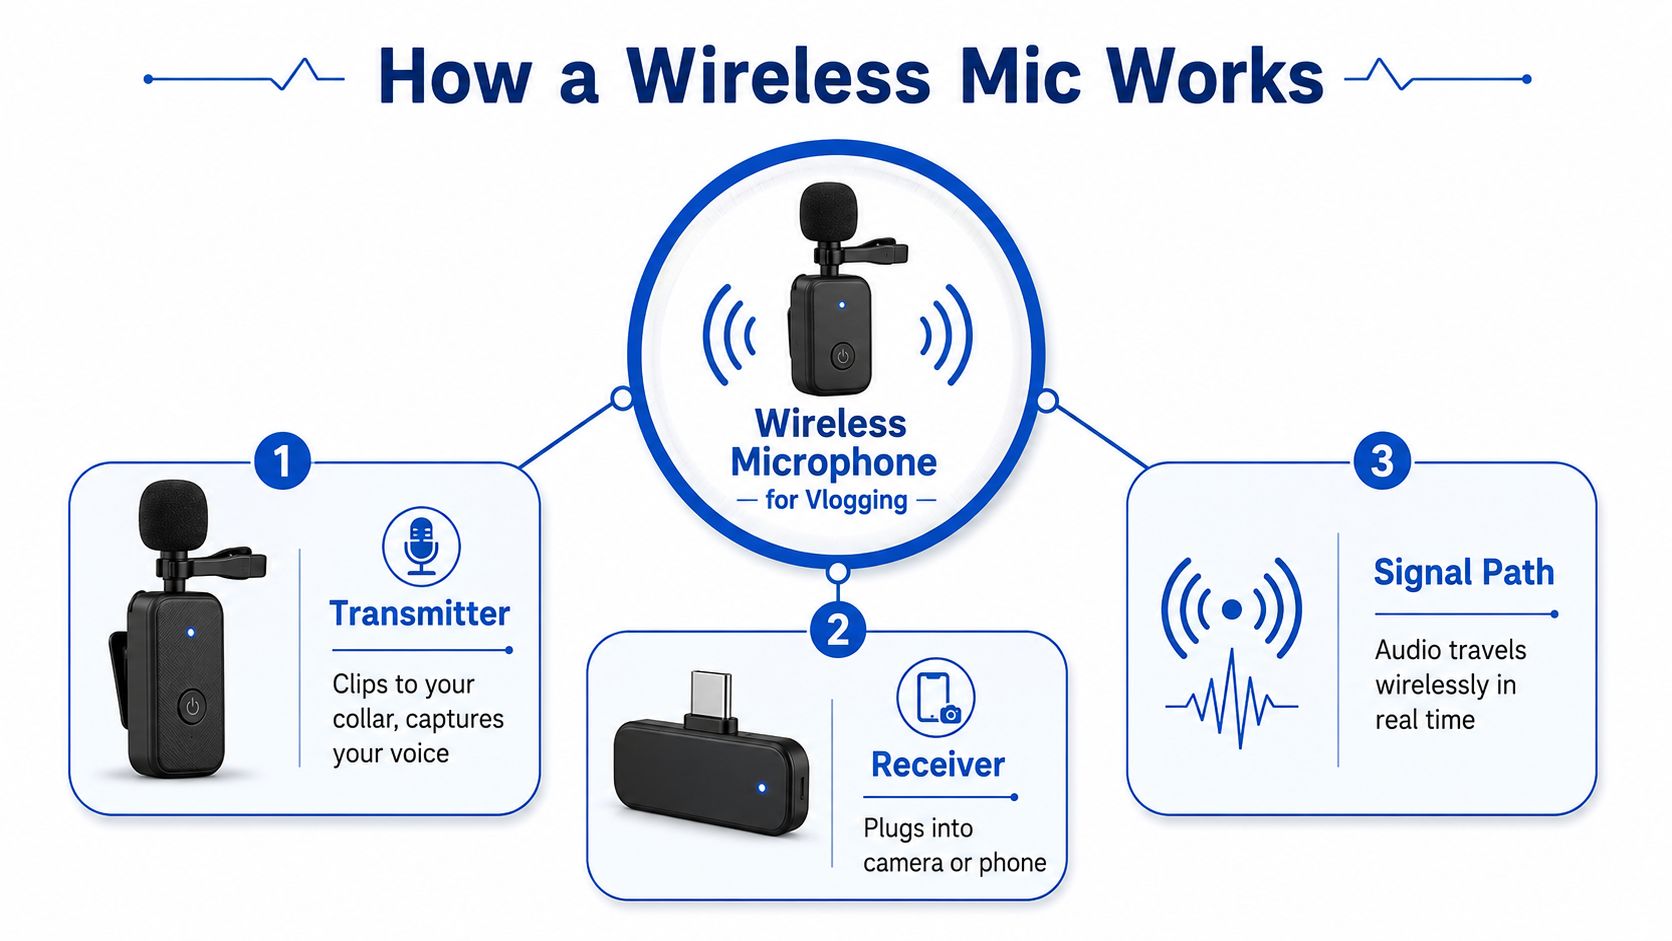
The basic pieces
Most creator systems are built around three parts, a transmitter, a receiver, and the radio link between them. The transmitter clips to clothing, the receiver plugs into a phone or camera, and the link carries speech in real time so the audio lands with the video instead of being trapped at the camera body. That's the core reason modern systems have become standard kit for mobile creators, especially now that flagship gear like the Rode Wireless Pro adds 32-bit float recording and internal storage, while the DJI Mic Mini is positioned as the smallest and lightest option with a 48-hour charging-case runtime (buying guide).
The main formats creators actually use
The classic format is the lavalier, also called a clip-on mic. It's discreet, sits close to the mouth, and works well for talking-head videos, tutorials, and interviews. A handheld wireless system makes more sense for vox pops, street interviews, or anything where the mic should be visible and easy to pass between people.
There's also a growing hybrid class that blurs the line between creator and production gear. Products like Boya Magic and DJI Mic 3 show how far the category has moved from simple wireless lav kits toward all-in-one tools for solo creators and small teams. If you want a broader creator-audio angle after this, the comparison in Thumbo AI's view growth guide is useful because it shows how cleaner audio supports watch time, not just sound quality.
Practical rule: if your mic choice makes you think about your body position more than your actual video, it's probably the wrong form factor.
A good first setup also depends on the rest of your workflow. If you shoot with a phone most of the time, a compact receiver matters more than studio extras. If you switch between a phone and a camera, compatibility matters more than raw range. For a related breakdown of echo control on compact rigs, see DigiDevice's echo-cancelling microphone update.
Key Specs That Matter for Vlogging
A spec sheet can look impressive while still being useless in a real shoot. For vlogging, only a few numbers change what you hear on camera, and the most important one is often not the one marketing teams highlight first. If audio delay makes lip sync feel off, the mic gets annoying fast, even if the frequency response looks perfect on paper.
Latency and range are the first filters
Latency is the delay between speaking and hearing or recording the sound. One reference creator system lists <5 ms latency, 24-bit/44.1 kHz, 96 dB dynamic range, 50 Hz–20 kHz response, 110 dB SPL, and a 28 g transmitter, all of which point to a system built for speech capture that stays responsive and clean during live monitoring and handheld shooting (technical reference). For vlogging, that low delay matters because mismatched mouth movement stands out right away when you review a clip or monitor while filming.
Range needs even more context. Most 2.4 GHz creator systems are rated at 100-200 m line of sight, but often only about 40-60 m through walls or obstructions, according to buyer guidance for current wireless kits (range analysis). That is why a mic that looks powerful on a product page can still stutter when you turn a corner, walk behind a car, or hold the phone too close to your body. Real range depends on where you vlog, not just the spec line.
Battery and sound headroom decide whether the mic survives a full day
Battery benchmarks matter because creators rarely shoot in neat, one-hour blocks. A recent testing roundup notes that most systems last 6-10 hours per transmitter, while charging cases extend total runtime to 40 hours for the Hollyland Lark M2, 48 hours for the DJI Mic Mini, and 54 hours for the Hollyland Lark A1 (battery roundup). That is the difference between worrying about a top-up and just carrying the case.
What I watch for in testing: a system that sounds decent at home can still fall apart when the receiver is blocked by a phone, a chest, or a jacket. Stability matters more than a flashy max-distance claim.
For speech, the useful audio details are simpler than the marketing copy. A useful creator guide says speech-focused frequency response is usually 50 Hz–15 kHz, battery life is often 4-8 hours, and a delay under 12 ms is recommended for good usability (usage guide). That lines up with how vloggers work, clear voices, quick setup, and no drama when the camera starts rolling. If you want a practical comparison point for loud environments, the same mindset applies to noise-canceling mic choices for noisy setups, because background rejection matters just as much as clean capture.
A good fit for mobile creators also depends on the environment. If you shoot near traffic, in venues, or on busy streets, a mic with adaptive frequency hopping or backup recording is more forgiving than one that only claims a huge distance. For a practical next step, Gainsty's upload quality tips are a good reminder that strong source audio pays off across every platform, not just YouTube.
Wireless Versus Wired Mics for Different Vlogging Scenarios
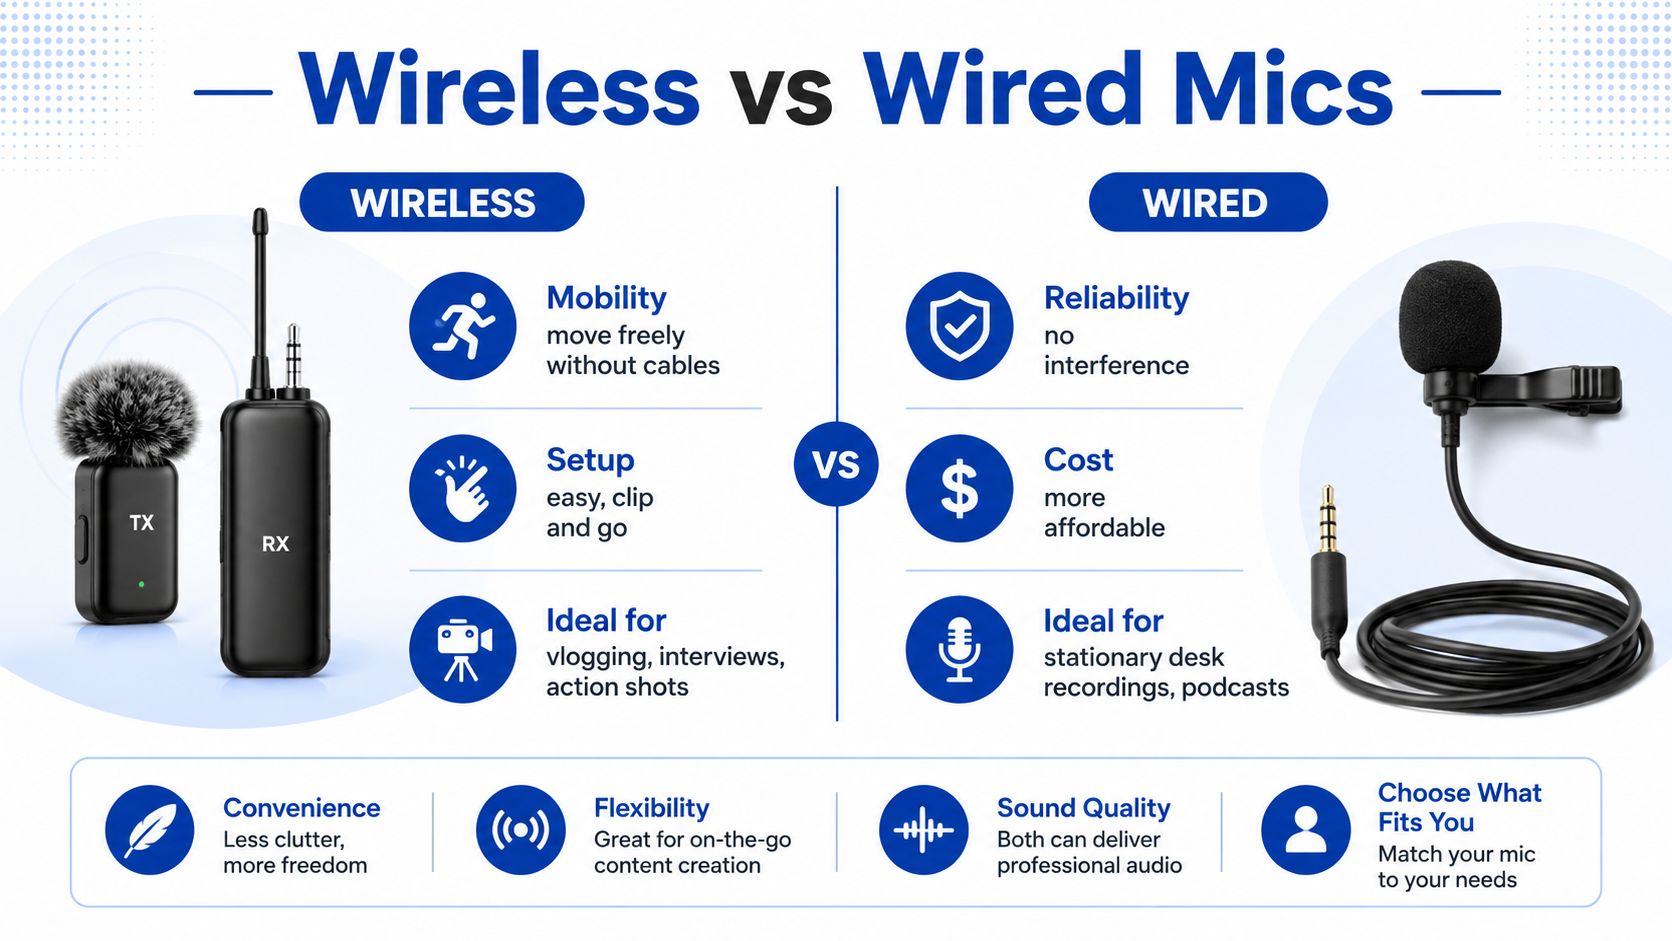
A wireless microphone for vlogging solves one problem and creates a few others. It gives you room to move, but it also adds batteries, pairing, receiver placement, and the chance of dropouts when the room gets crowded with signals or when the receiver sits behind your phone, body, or jacket. Wired setups look less exciting, yet they are often the cleaner choice when the shot does not need freedom.
Where wireless wins
Walking vlogs, travel clips, behind-the-scenes coverage, and one-person interviews all benefit from wireless because the camera can stay put while you move naturally. That matters for smartphone creators and solo shooters, since compact kits are designed to clip on, connect quickly, and stay out of frame. A widely used creator system with 2.4 GHz adaptive frequency hopping, up to 200 m range, 8 h transmitter runtime, and 110 dB SPL input shows the kind of engineering that makes wireless workable for moving content, not just seated speech (Hollyland reference).
The advantage shows up when your hands are busy or your framing keeps changing. If you are turning toward storefronts, crossing streets, or reacting on the move, wireless keeps the audio attached to the person speaking instead of the camera position. That is also where smartphone-first compatibility matters, because some systems pair quickly with a phone while others need adapters, extra cables, or a receiver position that fights the rest of your rig. For creators comparing simple phone kits, the wireless lavalier microphone for iPhone and Android recording is the sort of product category that makes this trade-off easy to see.
Where wired still makes sense
If the camera stays still, the mic often should too. Desk videos, seated tutorials, podcast-style shoots, and studio talking heads are all places where a wired mic can be more predictable, because there is no receiver to charge and no radio environment to manage. The trade-off is obvious, mobility drops, but simplicity goes up.
Close-range smartphone work can also be handled by a budget wireless option, yet some systems in that tier are built around 20 m barrier-free reception and 9 ms ultra-low latency, which points to short, direct setups rather than chaotic run-and-gun movement (budget comparison). That works when you stay near the camera and keep your body oriented toward the receiver. It is less reassuring if you turn away, step into a venue, or vlog through a crowded street.
Decision shortcut: choose wireless if movement is part of the shot. Choose wired if the camera is fixed and reliability matters more than mobility.
I see many creators carry both, and that is usually the most practical answer. Wireless handles the shots that need motion, while wired stays in the bag for controlled scenes, backup recording, or desk work. For creators building a broader mobile-audio kit, DigiDevice's lineup can help when you need cables, adapters, and phone-side gear that keep the setup tidy and quick to rig.
Flagship and Mid-Range Wireless Mic Systems Compared
The market has shifted from basic lav kits to a wider spread of creator tools, and that matters if you are choosing for daily vlogging rather than spec sheet bragging. For most creators, the key question is not just price, it is whether the system stays usable when you move fast, switch devices, or record in imperfect conditions. Current buying guides place common options in a range from about $140 to $399, with the Hollyland Lark M2 around $140-$180, the DJI Mic 2 around $269-$349, and the Rode Wireless Pro around $399 (price and range guide).
| System | Approx. Price | Range | Battery Runtime | Standout Feature |
|---|---|---|---|---|
| Hollyland Lark M2 | $140-$180 | 300 m | Not listed in the guide | Compact creator-friendly design (price and range guide) |
| DJI Mic 2 | $269-$349 | 250 m | Not listed in the guide | Strong all-round creator feature set (price and range guide) |
| Rode Wireless Pro | $399 | 260 m | Not listed in the guide | 32-bit float recording and internal storage (price and range guide) |
| DJI Mic Mini | Not listed in the guide | Not listed in the guide | 48-hour charging-case runtime | Smallest and lightest option in current buying guides (price and range guide) |
What the differences mean in practice
The pricier systems are not only about range. 32-bit float recording matters because it gives you margin when someone laughs, raises their voice, or gets closer to the mic than planned. Internal storage matters for the same reason, since it gives you a second copy if the wireless link has a bad moment.
The lighter kits change how often you carry them. A small system that disappears into a pocket tends to get used every day, while a more capable system that feels bulky can stay in a drawer. That is why the DJI Mic Mini can make sense for solo creators who want something they will keep on them, while the Rode Wireless Pro fits creators who want more backup and more room to clean up the recording later (Gainsty's upload quality tips).
Range numbers also need context. In real vlogging, a “long range” rating matters less than whether the transmitter stays stable when your body turns, a bag blocks the path, or you drift into a crowded space. That is the practical trade-off behind the specs, and it is why I weigh range together with how a mic behaves on a phone, a camera, or a gimbal rather than treating the marketing claim as the whole story.
For creators who want to keep a smartphone setup clean and avoid adapter clutter, the device-side details matter as much as the transmitter itself. A good next step is a practical note on smartphone audio setup basics, because the best-sounding kit still fails if the phone connection is awkward.
A strong shortlist for vlogging usually comes from matching the kit to the job, not chasing the biggest number on the box. If you need simple phone shooting, compactness matters more. If you record in messy environments, backup recording matters more. If you want one kit that can stretch into higher-end production, internal recording and more file headroom start to justify the premium.
Smartphone, Camera, and Gimbal Compatibility Guide
A wireless kit can look universal on paper and still become annoying the moment you put it on a real rig. Phone cases block ports, charging adapters get in the way, and a receiver that sticks out too far can throw off a gimbal balance. The question is how you shoot, not just whether the box says USB-C or Lightning.
Check the device first, then the workflow
If you vlog on a phone, check whether the receiver can stay connected while the phone is charging. A thick case can prevent a clean fit, and a hub can turn a simple phone setup into something clumsy if it uses the same port you need for audio. A recent Reddit discussion on vlogging setups points to the same problem, buyers often need both a USB-C receiver for a phone and a 3.5 mm receiver for a camera, or they end up buying adapters later (setup discussion).
Phone-first creators should also check whether their normal rig leaves room for a mic receiver and a charging cable at the same time. That detail sounds small until you are on location and the port is already occupied. For a cleaner starting point, the practical notes in smartphone audio setup basics are worth reading before you buy anything else.
Hybrid creators need a system that can travel between devices
Many vloggers switch between phone clips and camera shoots in the same week, sometimes in the same day. A multi-device kit is more useful than a single-device setup that only works well part of the time. Independent product coverage also shows this shift, with systems like BOYA BOYAMIC 2 and DJI Mic 3 presented for multi-device or direct-device connection use cases, which matches how creators are working.
The best compatibility wins are usually unglamorous. A receiver that sits flush with a phone is easier to live with. A system that works on both a camera and a smartphone avoids duplicate purchases. A mic that stays out of the way on a gimbal is worth more than a spec sheet that looks impressive in a product grid.
Practical check before buying: list your main device, your backup device, whether you charge while recording, and whether you shoot on a gimbal. If any of those answers is unclear, the wrong kit will cost you time later.
If you also publish short-form video, upload quality still matters after recording. Gainsty's upload quality tips pair well with a solid mic choice because clean capture holds up better than damaged audio once compression starts.
Setup, Placement, and Troubleshooting for Cleaner Audio
The cleanest wireless system can still sound amateurish if the transmitter is clipped badly or blocked by clothing. Placement matters almost as much as the model you buy. A lot of vlogging audio problems come from where the transmitter sits, not from the brand name on the box.
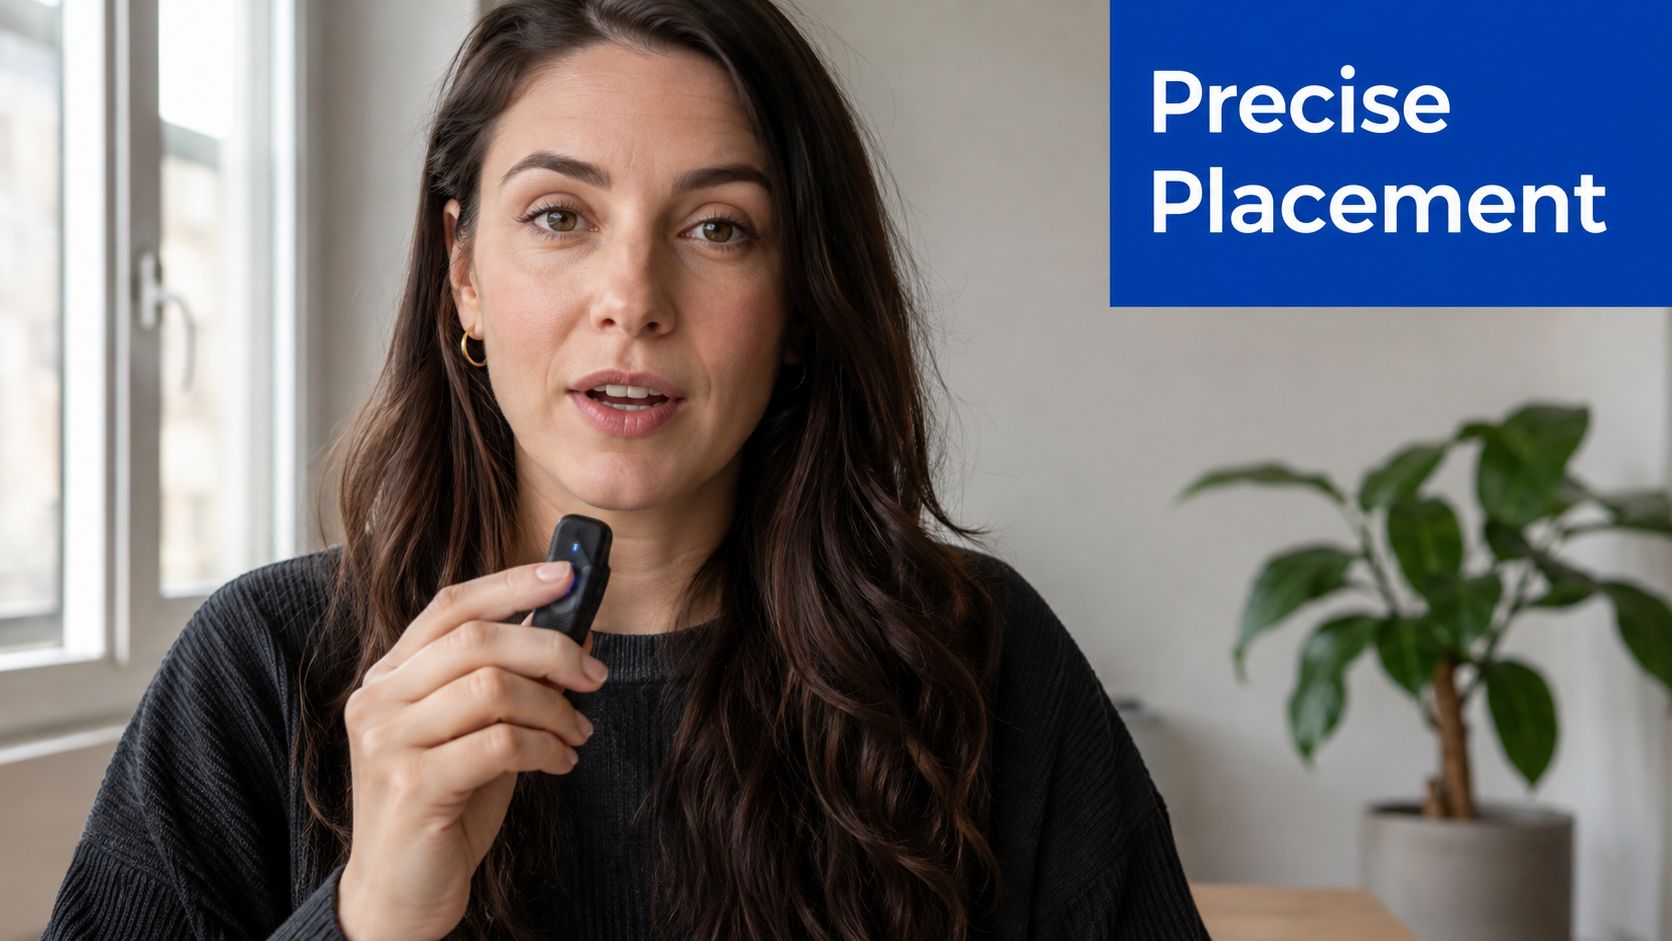
Placement that works
For everyday speech, keep the transmitter roughly 6 to 8 inches from the mouth and angle it slightly off-center so plosives do not hit the capsule straight on. Clip it securely so fabric does not rub across the mic during movement. If the shirt is noisy, move the clip a little lower or switch the attachment point instead of trying to rescue rustling in post.
Outdoors, wind control matters more than many beginners expect. A furry windshield helps, but position still does most of the work. If wind is hitting the capsule directly, no accessory can fully fix bad placement.
What to check before you hit record
Monitor levels before every serious take. A quick test phrase tells you more than any product page can. If the input is too hot, turn it down before the main clip starts, because clipped audio is painful to repair later.
A useful reference on ways to remove video audio echo helps when you are diagnosing room sound, but preventing the issue at the source is still better than trying to clean up bad capture later.
Quick troubleshooting flow
- Dropouts while walking: move the receiver so your body is not blocking it, then shorten the distance.
- Interference in busy areas: step away from Wi-Fi routers, Bluetooth-heavy gear, or crowded RF zones.
- Weak or dead battery: swap to the charging case before the next take, do not wait for the mic to fail mid-shot.
- Echo or hollow sound: move closer to the source and reduce reflective room surfaces when possible.
- Rustling audio: reposition the clip before assuming the mic itself is bad.
Video note for a field-check mindset, watch this quick reference on setup flow before your next shoot.
The biggest field lesson is simple. Stable placement solves more problems than expensive accessories do. A well-clipped mic with a clean line of sight will beat a premium kit that is pinned under a jacket or buried behind a phone. For creators who want audio tools that fit into a broader phone workflow, DigiDevice's mobile audio and accessory options are worth checking alongside your mic choice. If you are building a tighter starter kit, the guide to budget vlogging kits for TikTok and Reels is a useful companion read.
Budget Tiers, Must Have Accessories, and Final Decision Checklist
Budget matters, but hidden costs matter just as much. A cheap mic that forces you to buy adapters, extra cables, or a second receiver can end up being less convenient than a slightly pricier kit that already fits your workflow. The right purchase is the one that gets used every shoot, not the one that looks tidy on a shelf.
The three budget tiers
Entry-level kits suit creators who mainly record close-range phone content and don't need backup recording or advanced controls. Mid-range systems usually give you a better blend of stability, audio quality, and cross-device flexibility. Premium kits make sense when you want 32-bit float, internal recording, stronger RF resilience, and more confidence in difficult environments.
A practical example is the current spread of creator products from the Hollyland Lark M2 to the Rode Wireless Pro, which shows how much functionality changes as you climb the range and feature ladder (price and range guide). The gap isn't just sound quality, it's how much you can trust the system when the shoot gets messy.
Accessories that save shoots
- Spare transmitter: helps if you're recording interviews or need a backup piece.
- Extra wind protection: useful for walking vlogs and outdoor travel clips.
- Charging case or hub: keeps the kit ready without juggling loose cables.
- Phone and camera adapters: reduce last-minute compatibility surprises.
- Storage pouch: keeps clips, windscreens, and cables from disappearing between shoots.
For a practical shopping reference, see DigiDevice's budget vlogging kits guide if you're building a setup around mobile creation instead of studio work.
Final decision checklist
- Primary device: phone, camera, or both.
- Typical distance: close talking-head work or moving walk-and-talk content.
- Environment: quiet room, street, venue, or mixed indoor and outdoor.
- Battery expectation: short clips, or all-day shooting.
- Need for backup recording: yes or no.
- Budget ceiling: choose the simplest kit that handles the hardest scenario you film.
If you want the shortest answer, buy for your hardest shoot, not your easiest one. That's the difference between a mic you admire and a mic you rely on.
DigiDevice carries creator-friendly audio accessories and mobile gear that fit the way vloggers shoot, from phone-side adapters to practical add-ons that make a wireless setup easier to live with. If you're ready to tighten up your audio workflow and choose a kit that suits your phone or camera, visit DigiDevice and check the current options before your next shoot.